-
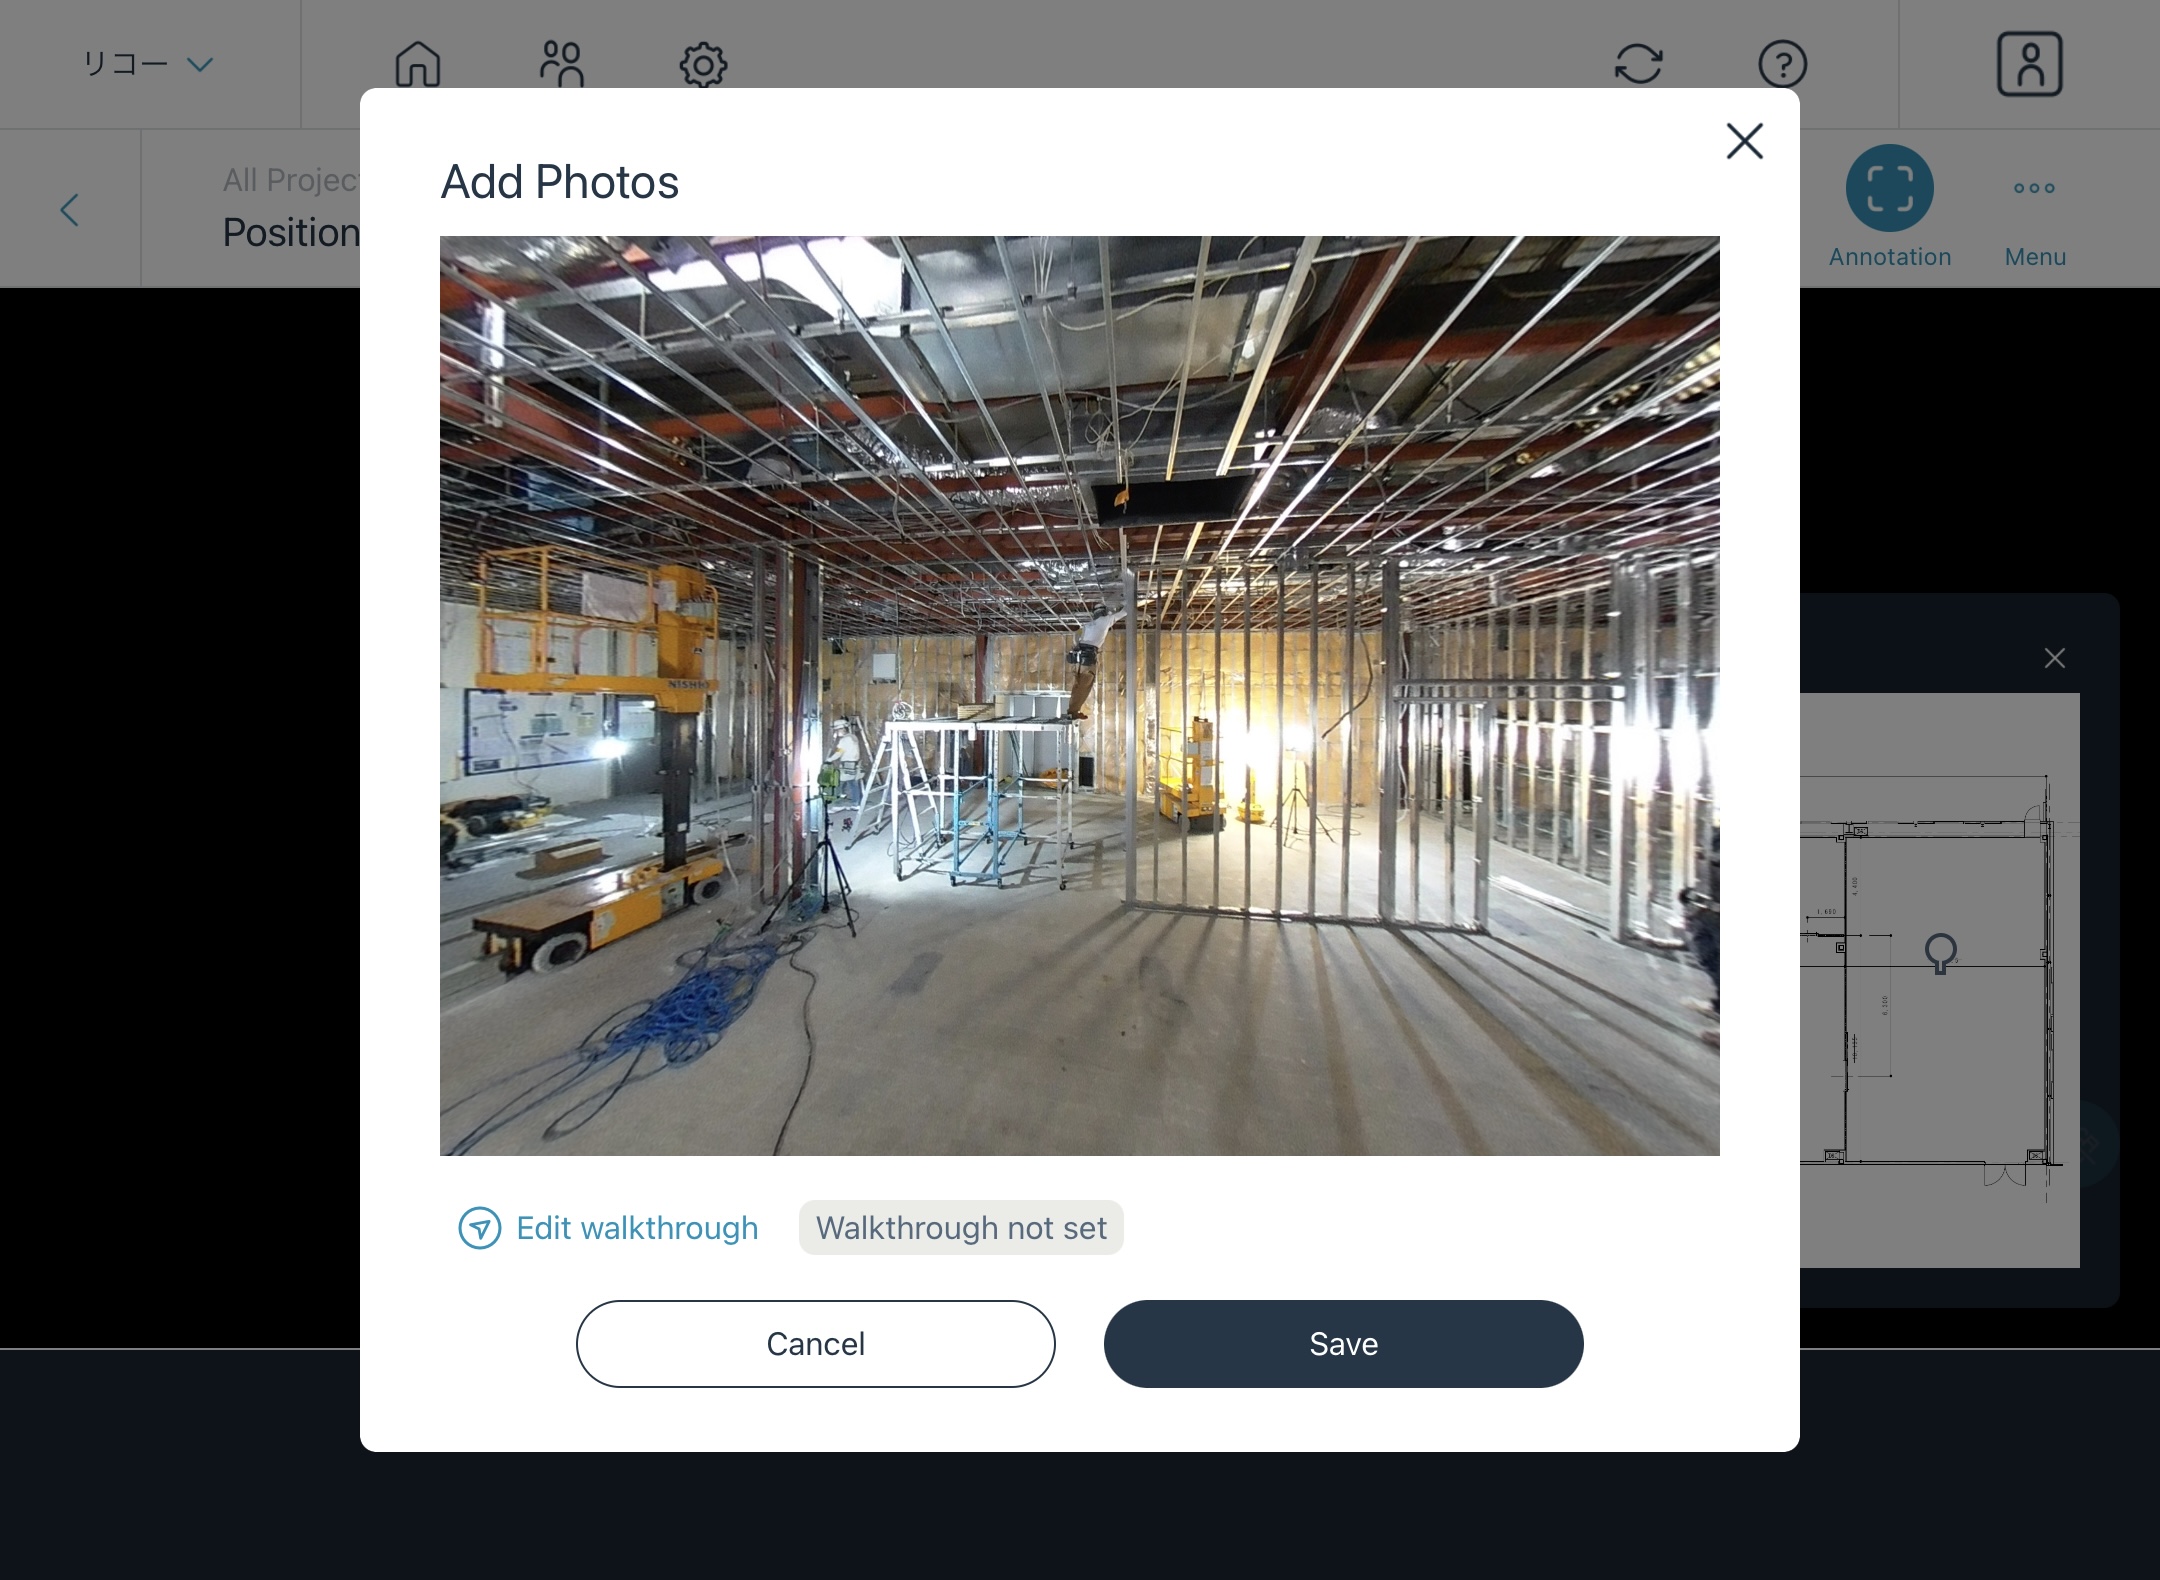
Select "Edit Walkthrough" when adding your 360° image.
-
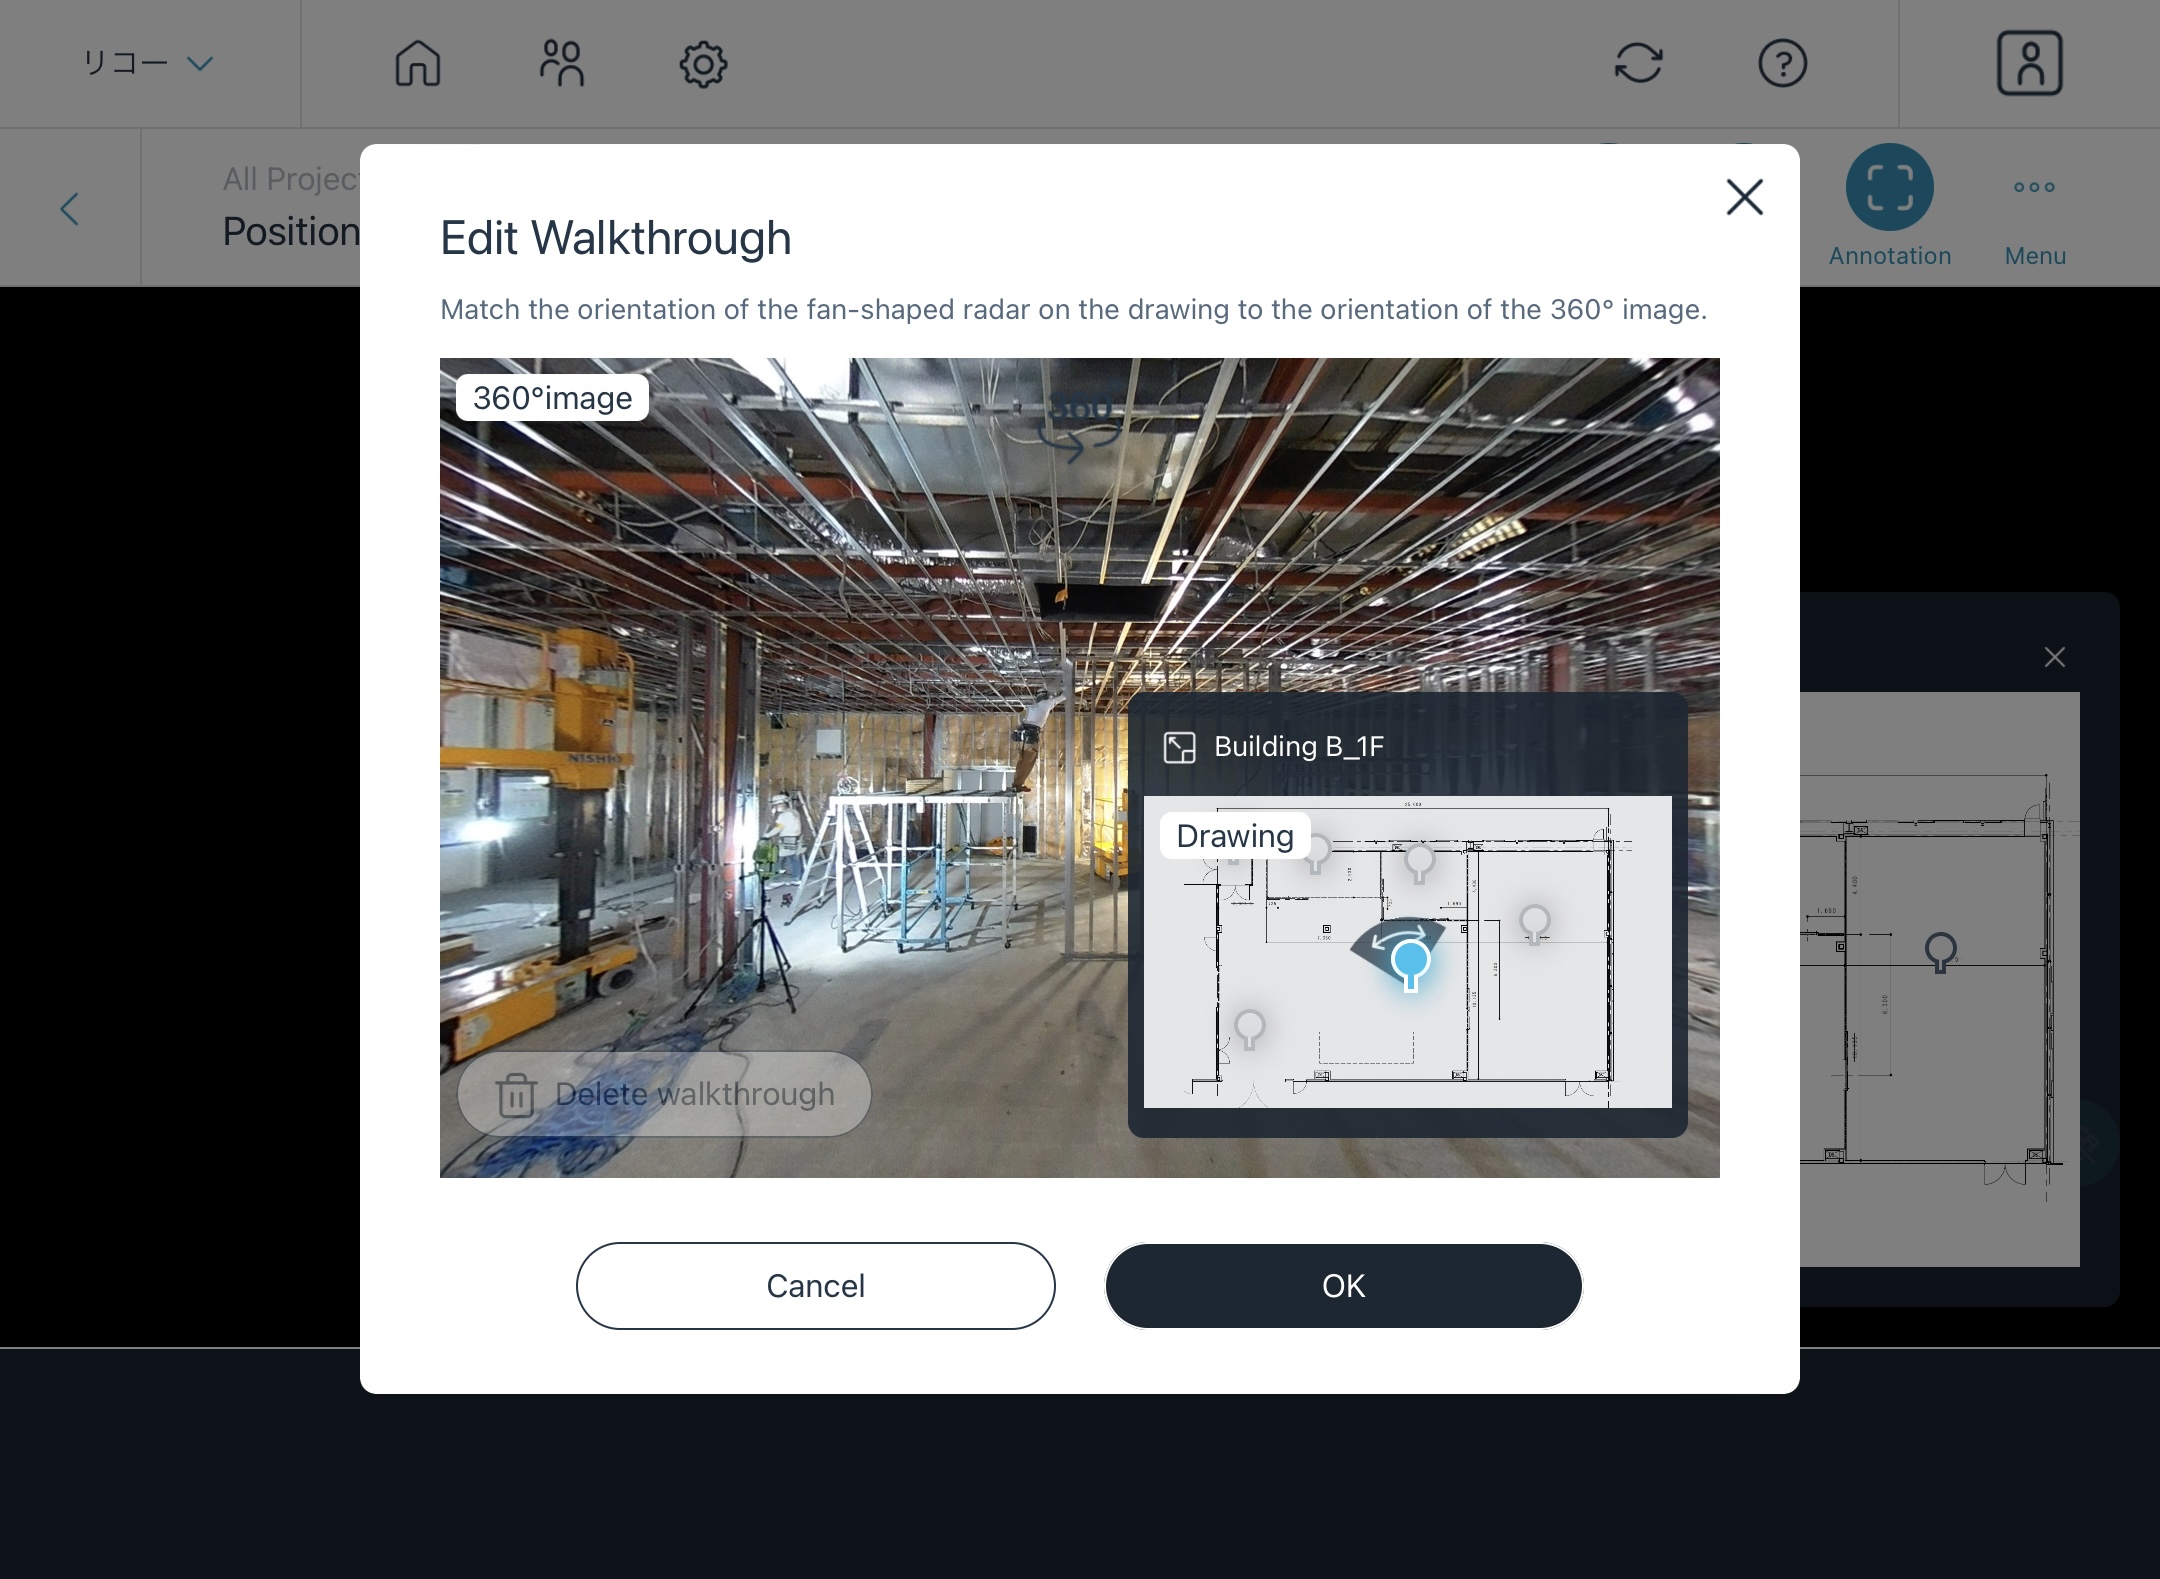
On the walkthrough edit screen, align the orientation of the 360° image with the orientation of the fan-shaped radar on the drawing and press OK
-
Confirm that the notation below the photo has changed to "Walkthrough set up" and select Save.

-
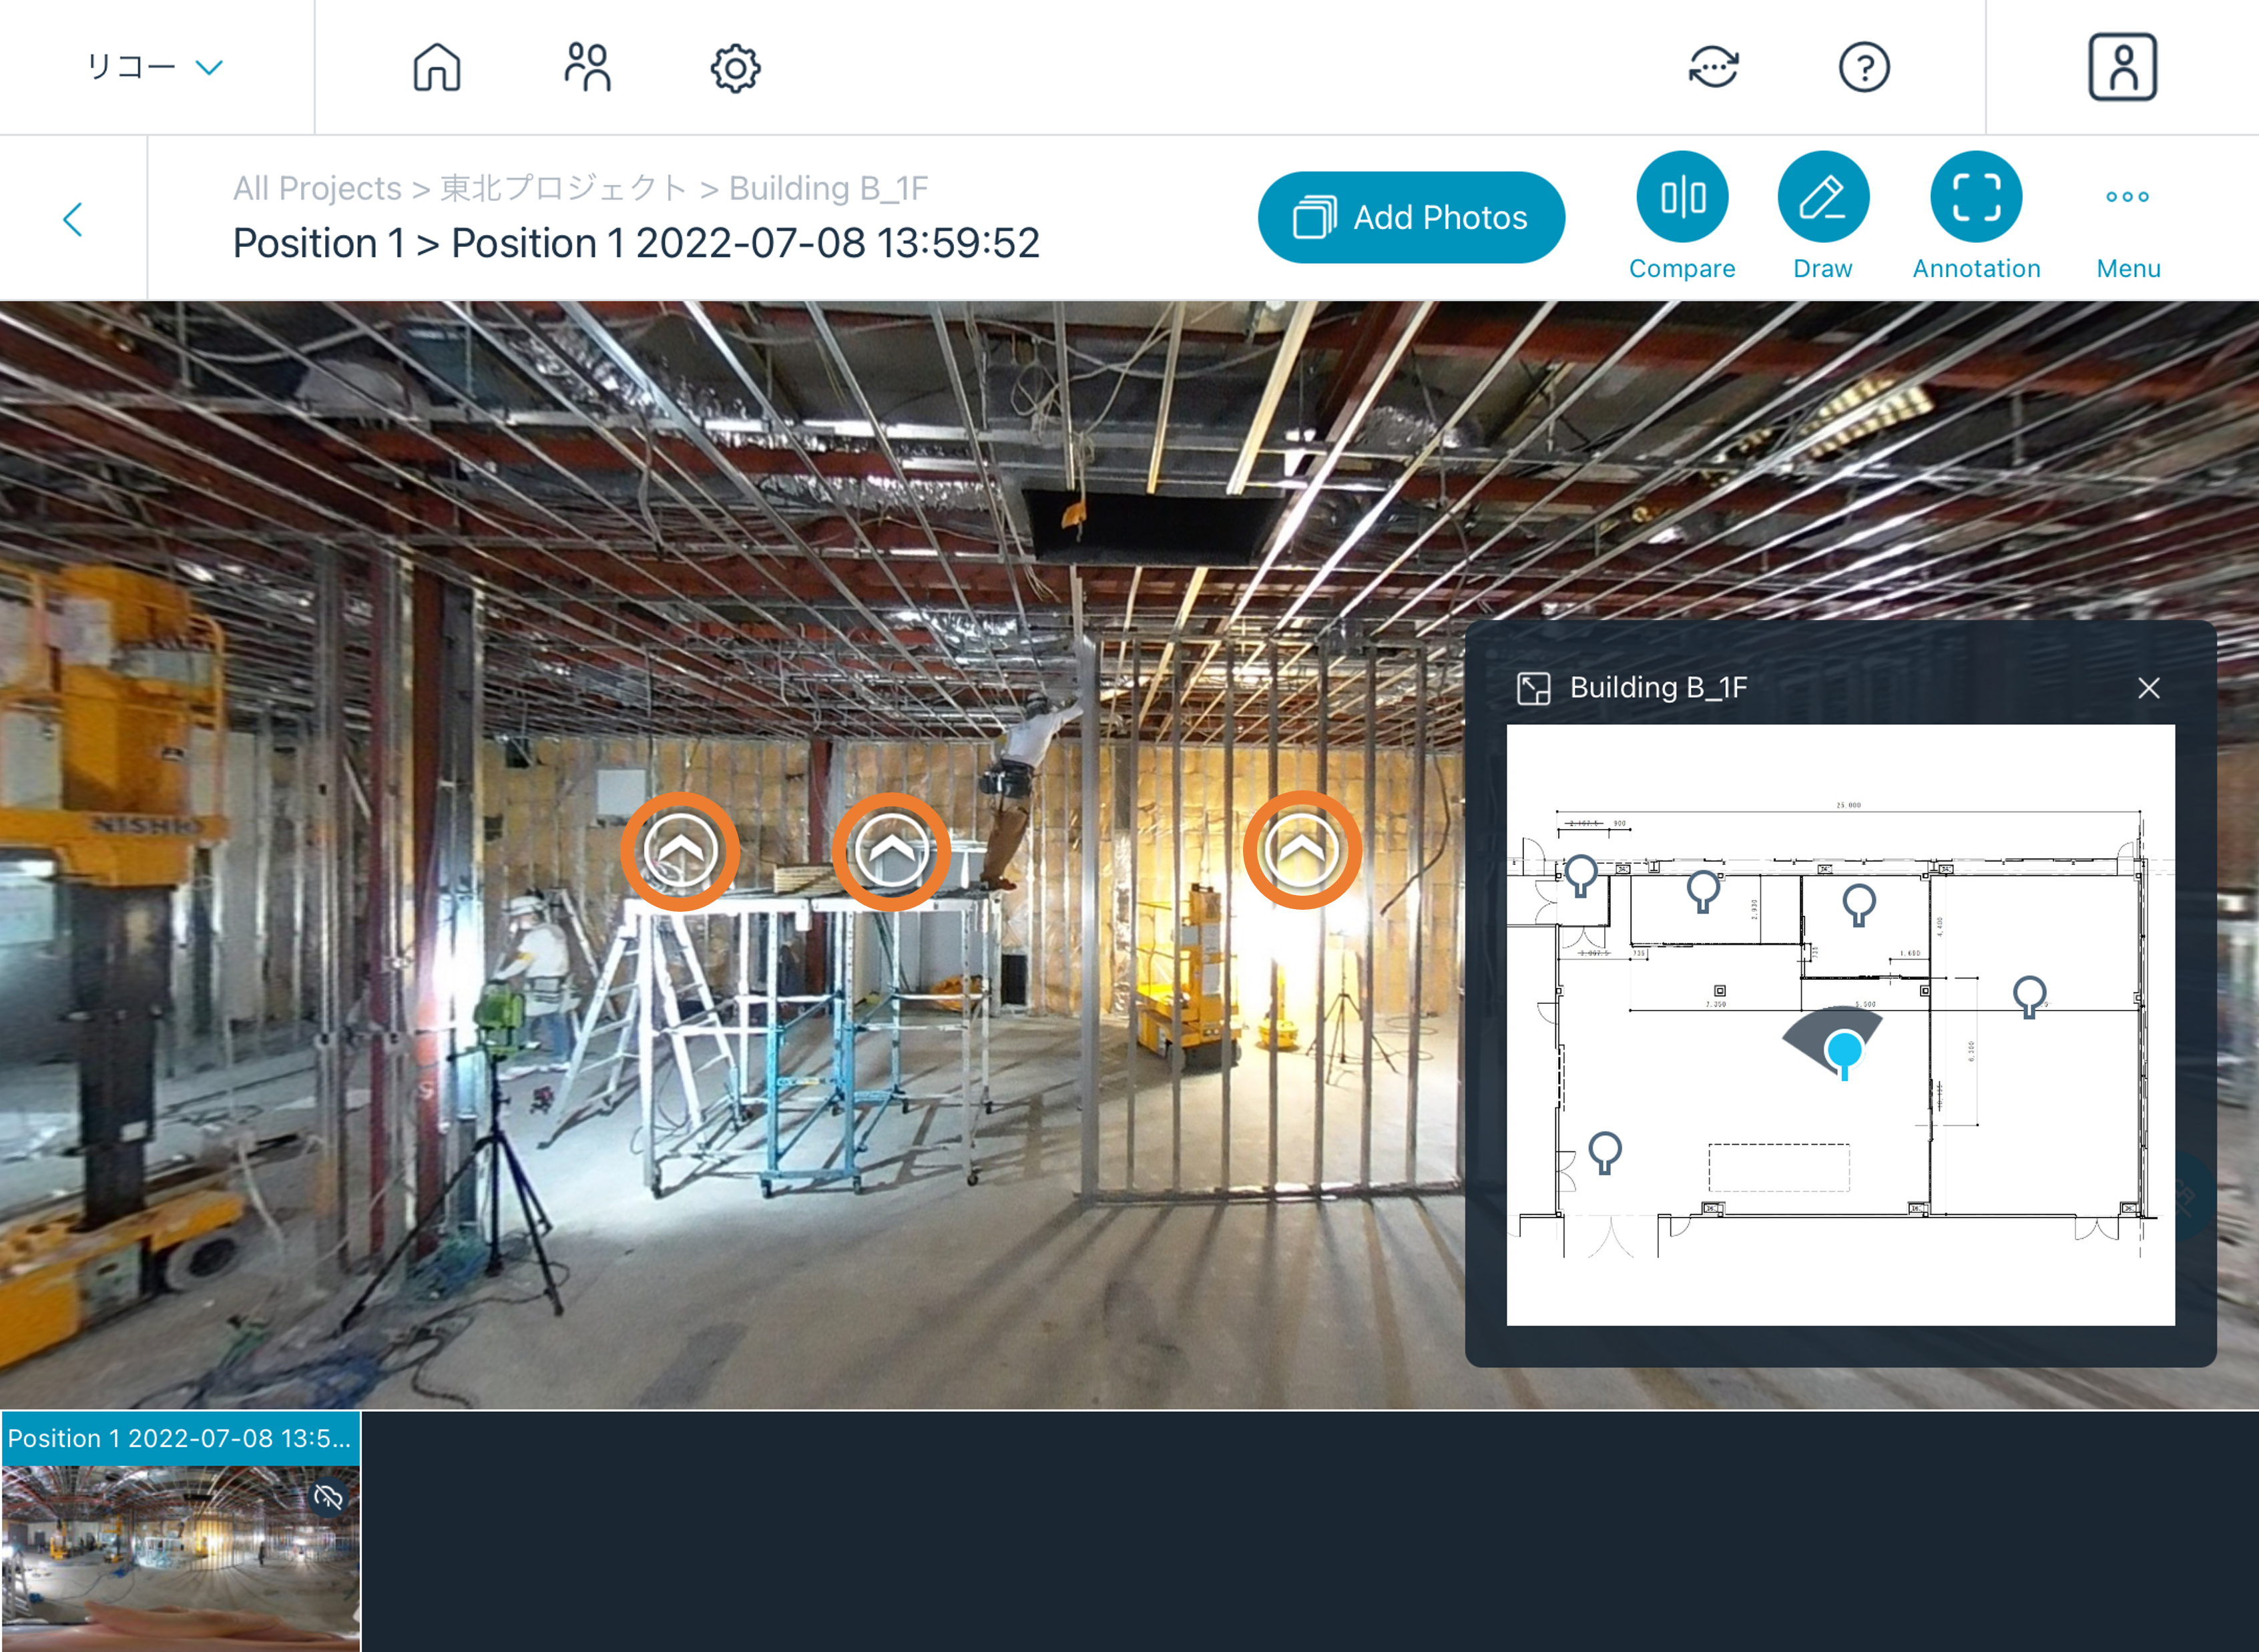
Navigation to the 360° images of the nearby shooting location will be automatically created in the 360° image.