Create a "Walkthrough" that connects 360° images to each other, allowing you to move through the project more intuitively.
Create a Walkthrough by matching the orientation of the fan-shaped radar on the drawing to the orientation of the 360° image
-
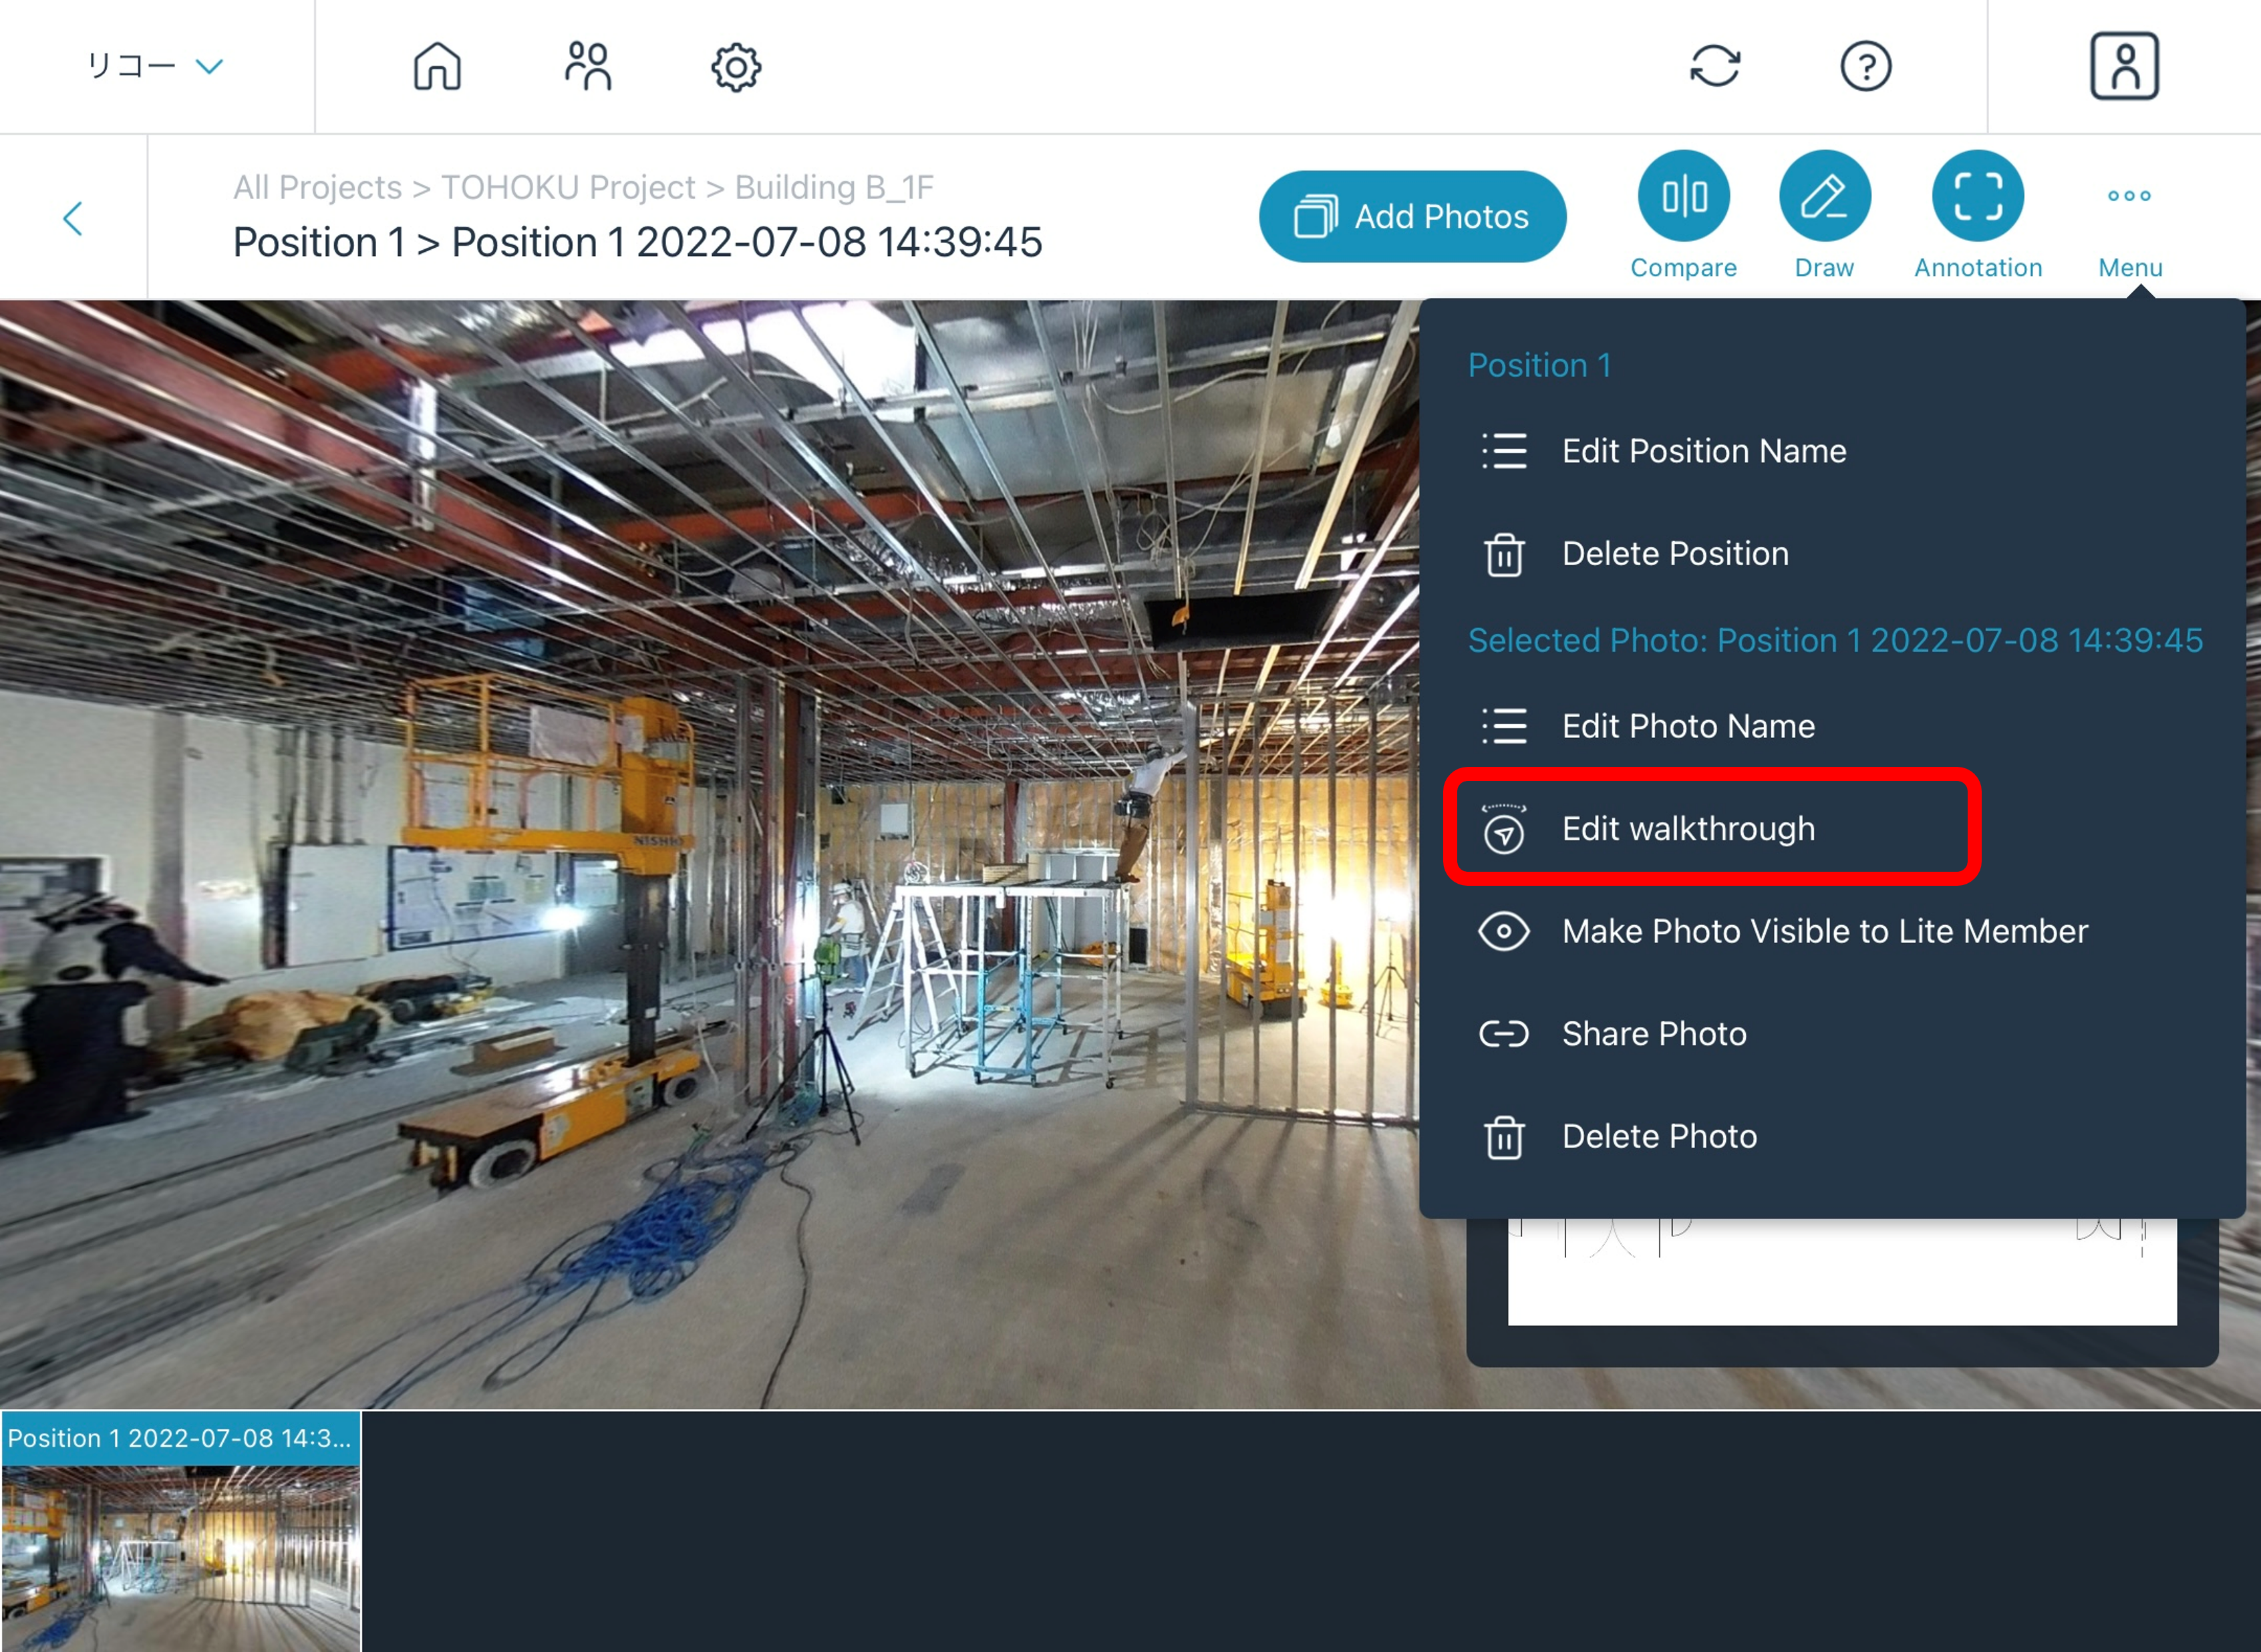
Open your 360° image and select "Edit Walkthrough" from the menu

-
Match the orientation of the fan-shaped radar on the drawing to the orientation of the 360° image.

-
Press OK
-
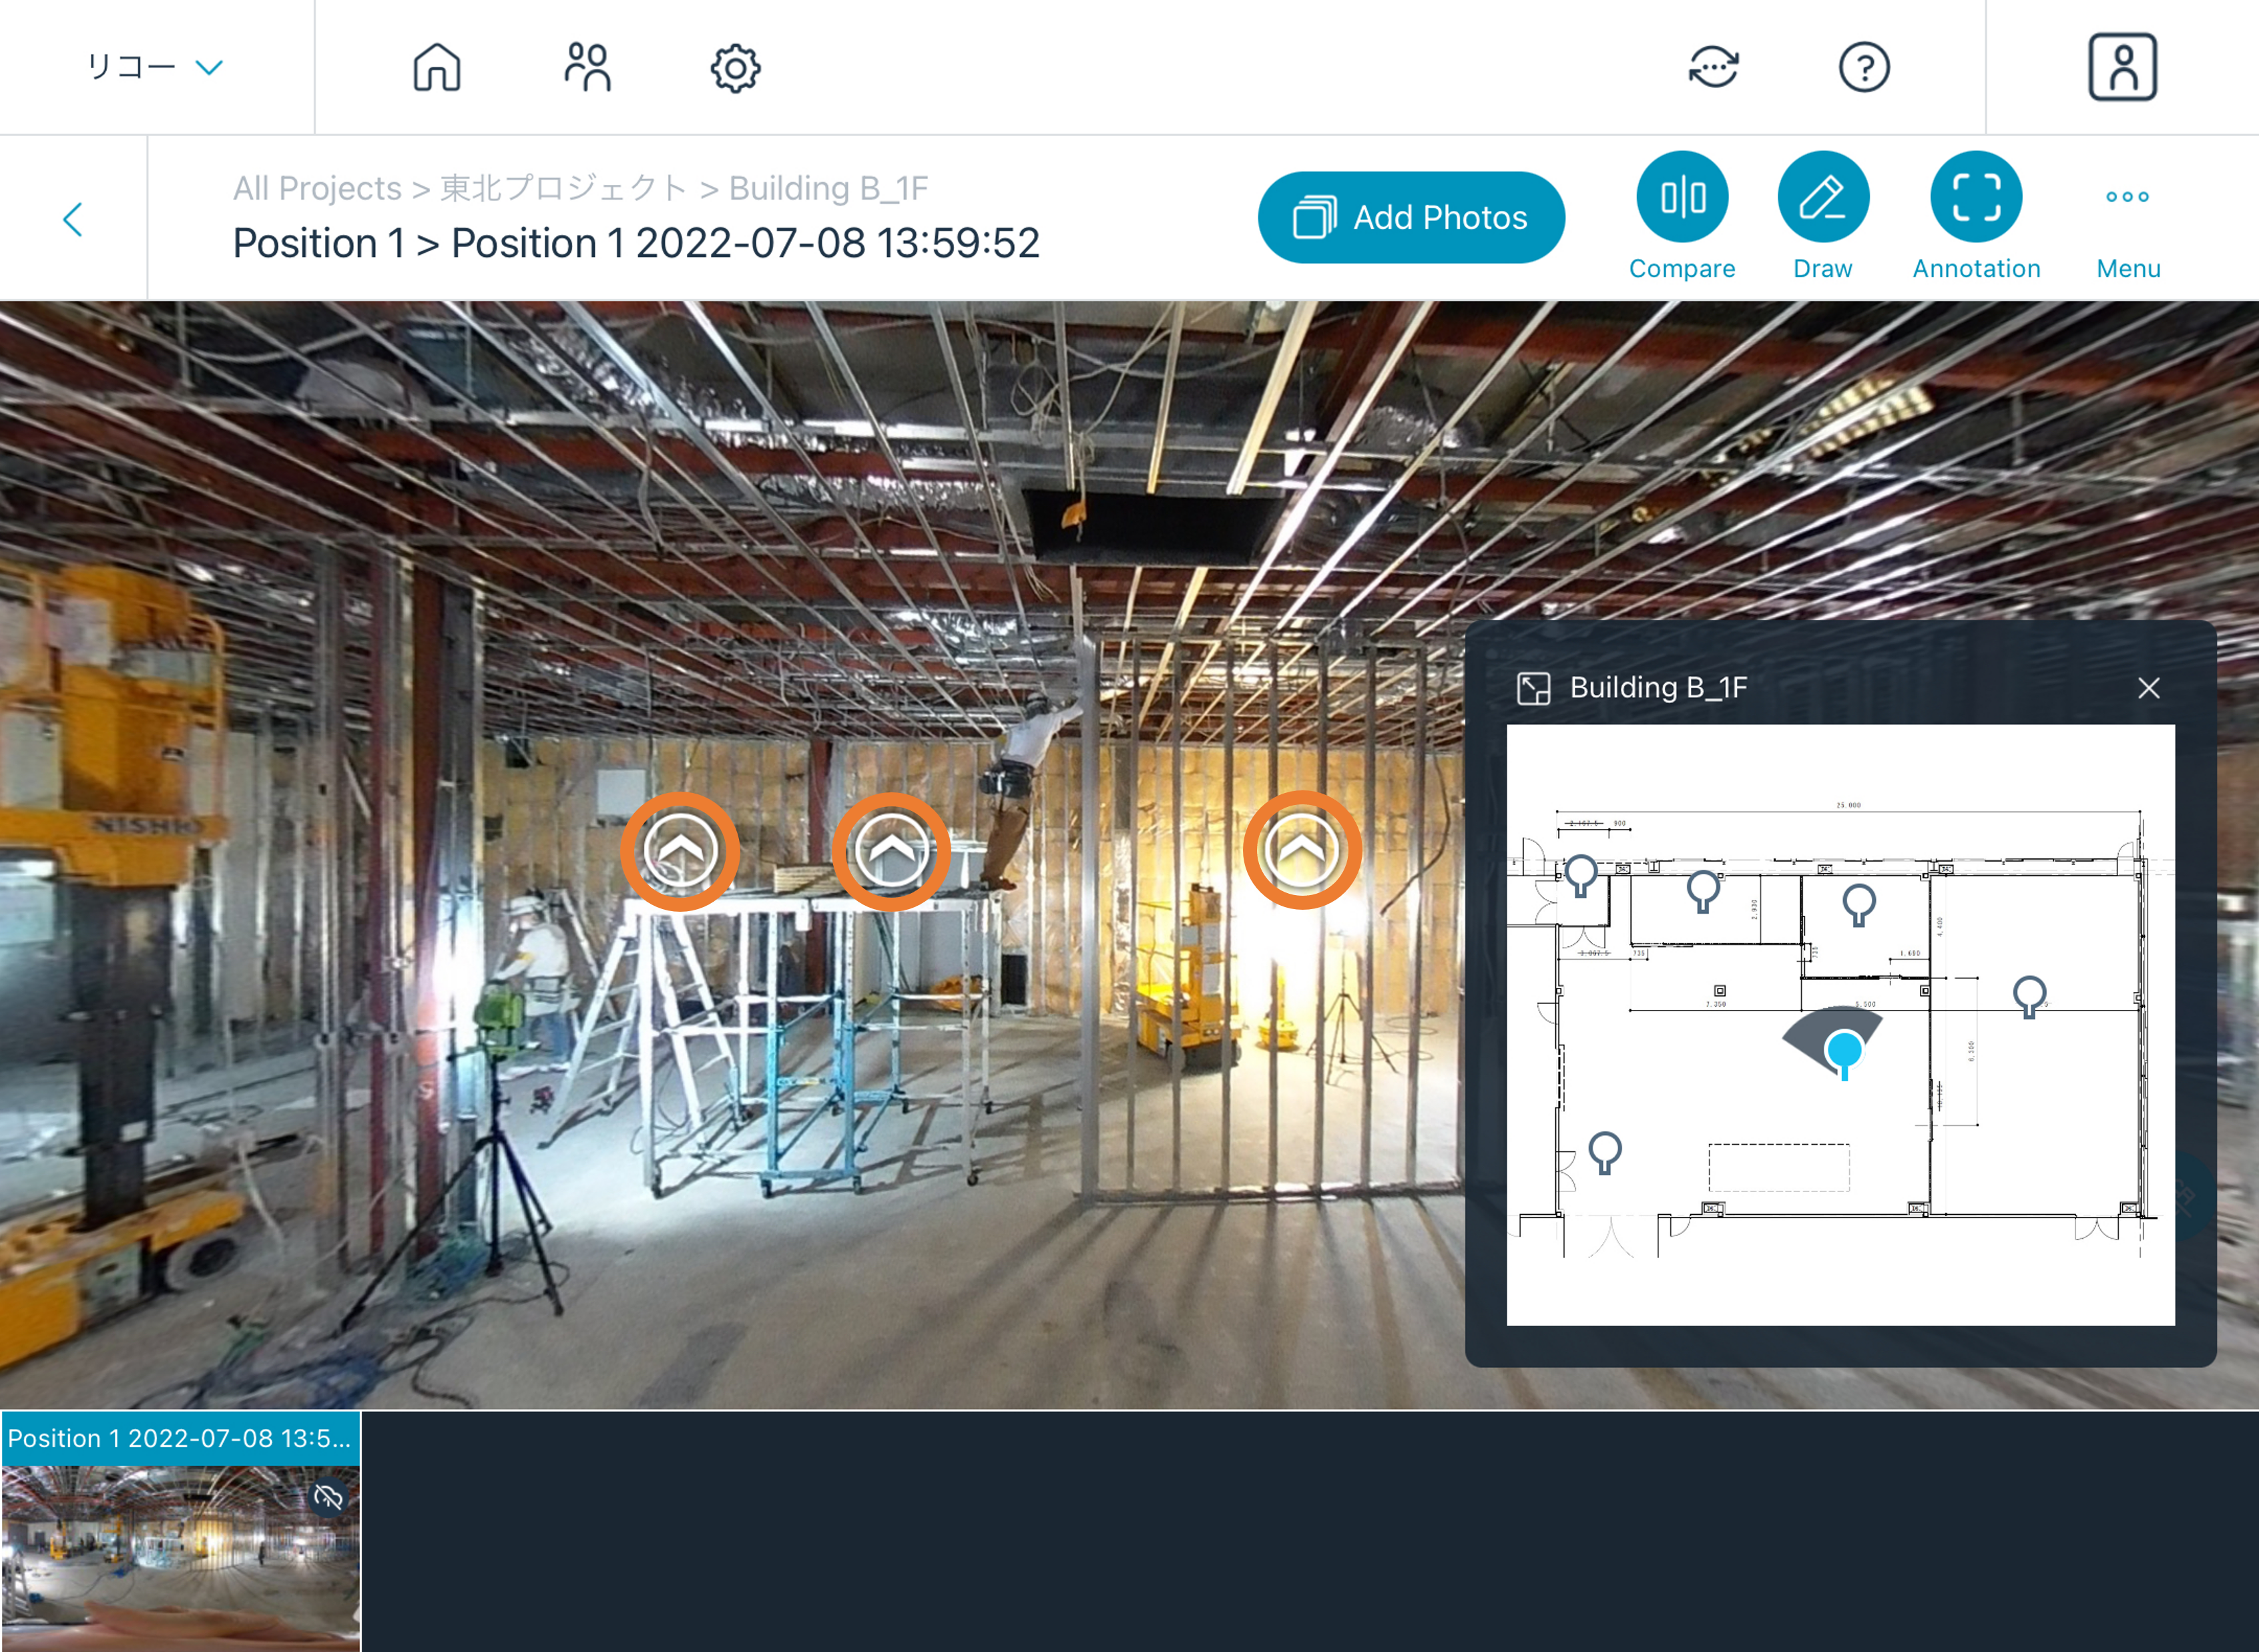
Navigation to the 360° images of the nearby shooting location will be automatically created in the 360° image.

-
Select the arrow in the direction you want to move in order to move to the next 360° image.
-
Repeat steps 1-4 for all images to create a Walkthrough for your entire project.
*Check the box "Delete walkthrough settings for this image" and press Save to delete the walkthrough settings.
*You can choose to turn it on or off using the ![]() on the web app
on the web app